
The easiest way to choose a Halloween nail design is to start with a film you already love. A film gives you a colour palette, a mood, and a few clear symbols to work with, so you do not have to invent a design from nothing. You can keep it as simple as two colours, or build it into a full set with one detailed accent nail.
This guide covers eight films with a distinct nail idea for each one, plus a quick table to help you choose. You do not need to watch all of them, and you do not need professional tools for most of these designs. A thin brush, a dotting tool or a toothpick, and a good top coat will cover almost everything below.
How to pick a film design that works for you
Start with the mood, not the character. A dark, elegant film suits deep colours and clean lines, while a bright, playful film suits glitter, bold stripes, and one fun accent nail. Next, think about nail length. Short nails suit one accent design and a simple colour story, while longer nails can carry stripes, faces, and layered details more easily. Finally, be honest about time. A design with one detailed nail and nine plain nails looks finished and takes far less time than ten detailed nails.
If a design feels too difficult, simplify it. Use the film’s colours without its character, or use the character on one nail only. The colour palette alone is often enough for people to recognise the inspiration, and it is much easier to wear after Halloween as well.
1. Hocus Pocus: purple, green, and a little sparkle
Hocus Pocus nails work best in deep purple with black and a touch of green. Paint most nails in a rich purple, add black to one or two accent nails, and use a small green detail, such as a tiny star, a moon, or a glitter accent, rather than trying to paint a full scene.
Keep the base dark so the sparkle stands out. A purple glitter top coat over a plain purple base gives the magical feel without detailed art, and it is easy to remove later. This design suits medium and long nails, and it pairs well with a dark outfit without looking like a costume.
2. The Nightmare Before Christmas: black, white, and stripes
This is one of the most recognisable Halloween film looks, and it is simpler than it looks. The core idea is contrast: black and white, with stripes and simple shapes. Paint most nails black, add white stripes to one or two accent nails, and keep the rest plain so the stripes stand out.
For a Jack-inspired accent, use a white base on one nail, a simple black face shape with two dot eyes, and a thin smile line. You do not need a perfect portrait. Two dots and a curved line read as Jack at a glance, especially on a short nail. If faces feel too difficult, use black and white stripes only. That striped look is still clearly inspired by the film and is much easier to paint neatly.
3. Beetlejuice: bold black and white stripes
Beetlejuice nails are all about bold, uneven black and white stripes. Unlike the cleaner Nightmare stripes, these stripes can be a little wild, which actually makes them easier to paint at home. You do not need perfectly straight lines. Slightly uneven stripes look more like the film.
Try black and white stripes on all nails for a party look, or stripes on two accent nails with plain black nails for the rest. Add a single green accent, such as a green tip or a small green dot, if you want a nod to the film’s green tones without adding a whole new design. Keep the base coats thin, because stripes show bumps more than plain colours do.
4. Coraline: blue, yellow, and button details
Coraline nails use a cooler palette: deep blue, soft yellow, and black. Paint most nails in a deep blue, use yellow on one accent nail, and add a tiny button detail, such as four small dots in a square, on that accent nail. The button detail is the key symbol here, and it is easy with a dotting tool.
This design suits short nails well because the button detail is small and does not need a large nail surface. Keep the rest of the set plain so the button accent stands out, and use a gloss top coat to make the blue look deep and polished.
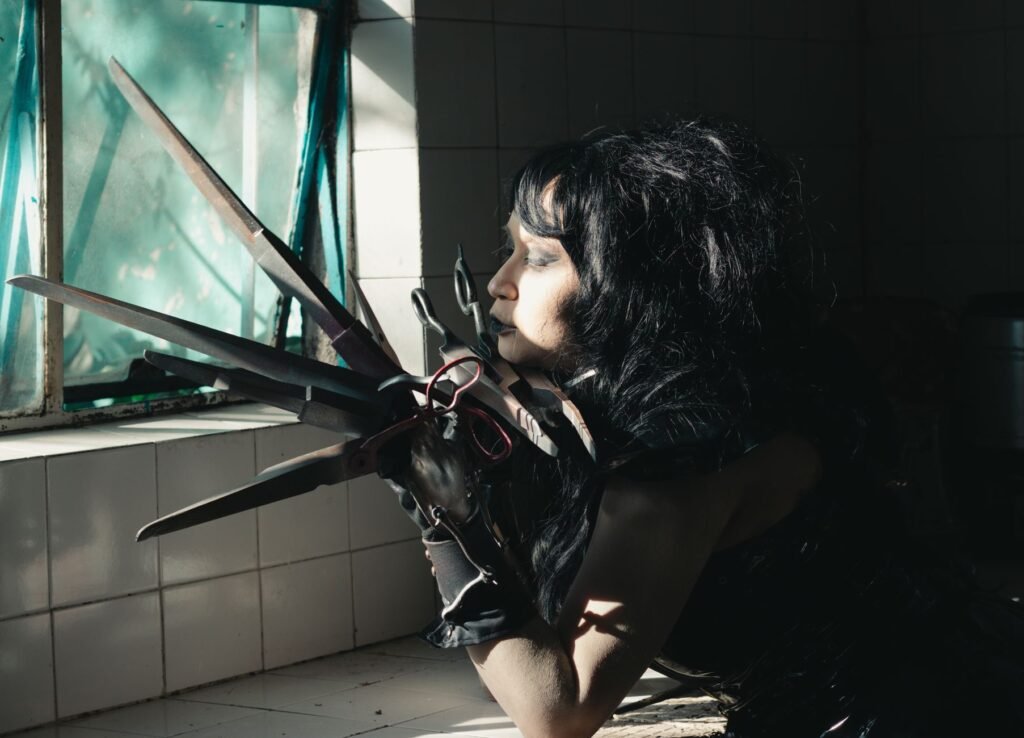
5. Edward Scissorhands: silver, black, and sharp lines
Edward Scissorhands nails suit a darker, more elegant look: black, silver, and grey. Paint most nails black, add a silver chrome or metallic accent nail, and use thin silver lines on one or two nails for a sharp, graphic feel.
This is a good choice if you like Halloween but do not want a cute or colourful design. The silver on black reads as evening-ready, and it works with both short and long nails. Keep the lines thin and straight, and use a top coat to protect the metallic finish, which can wear faster at the tips than a plain cream polish.
6. Wednesday: monochrome and minimal
Wednesday-inspired nails are monochrome and minimal: black, white, and grey, with very little colour. Paint most nails black, add a white accent or a simple black-and-white pattern on one nail, and keep everything else clean and matte or gloss, but not glittery.
This design is ideal for work or for everyday wear in late October, because it does not look like a costume. It also suits short nails, since the design is about clean colour blocks rather than detailed art. If you want one small Halloween detail, add a tiny white spiderweb corner on one accent nail and keep the rest plain.
7. Ghostbusters: green slime accent
Ghostbusters nails are fun because they break the usual black-and-orange Halloween palette. Use a dark base, such as black or deep green, and add a bright green slime detail on one or two accent nails. The slime can be a simple wavy line or a few dots near the tip, rather than a detailed ghost.
Keep the green bright so it stands out against the dark base, and use it sparingly. One green accent per hand is enough. This design is a good party choice, and it is easy to remove after Halloween because the base is a simple dark colour.
8. Casper and classic ghosts: soft white on dark
For a softer, friendlier Halloween look, use classic ghost nails: a dark base with a small white ghost on one accent nail. Paint the ghost as a simple rounded shape with two dot eyes, on a black, navy, or deep purple base. You do not need to paint a detailed face. A simple ghost shape reads clearly at a glance.
This design works well for beginners and for kids’ parties, and it is easy to adapt. Use a white ghost on a dark base for Halloween, or keep the same dark base with no ghost after Halloween and the set still looks finished.
Film, colours, and design at a glance
| Film | Colours | Easiest design | Difficulty |
|---|---|---|---|
| Hocus Pocus | Deep purple, black, green | Purple base + glitter accent | Easy |
| Nightmare Before Christmas | Black, white | Black base + white stripes | Easy to medium |
| Beetlejuice | Black, white, green accent | Bold stripes | Easy |
| Coraline | Deep blue, yellow, black | Blue base + button dots | Easy |
| Edward Scissorhands | Black, silver, grey | Black base + silver lines | Medium |
| Wednesday | Black, white, grey | Monochrome, one pattern nail | Easy |
| Ghostbusters | Black or green, bright green | Dark base + green slime accent | Easy |
| Casper / classic ghosts | Dark base, white | Small white ghost accent | Easy |
How to make a film design last
Film designs last longer when the base is prepared well. File in one direction, push cuticles back gently, and apply a base coat, two thin colour coats, and a top coat, letting each coat dry before the next one. For detailed accent nails, let the design dry fully before adding top coat, so the detail does not smudge.
Wear gloves for washing up and cleaning, and avoid using nails as tools. If an accent nail chips, file it smooth, repaint that nail only, and reseal with top coat. For glitter, chrome, or press-on designs, soak off gently rather than peeling, so the natural nail underneath is not damaged.
FAQs
Which movie nail design is easiest for beginners? A classic ghost accent or a Coraline button accent. Both use one simple shape on one nail, with the rest of the set in a plain dark colour, so you only need to practise one small design.
Can I mix two films in one set? Yes, if they share a palette. Black and white films, such as Nightmare Before Christmas, Beetlejuice, and Wednesday, mix well together. Avoid mixing too many different colour stories in one set, or the result looks random rather than themed.
Do I need special tools for these designs? No. A thin brush, a dotting tool or a toothpick, and a good top coat cover most of these designs. Stripes and dots are easier with a thin brush, but a toothpick works for small dots and simple lines.
Will these designs still work after Halloween? Many will. Monochrome Wednesday nails, deep blue Coraline nails, and black-and-silver Edward Scissorhands nails all work in November. Bright green Ghostbusters accents and full ghost sets are the ones to save for Halloween week itself.
What if I cannot paint a character face neatly? Use the film’s colours and one simple symbol instead of a face. Stripes, dots, a moon, or a button detail are enough to suggest the film, and they are much easier to paint neatly than a full character portrait.
Conclusion
Movie-inspired Halloween nails work best when you keep one idea clear: one film, one palette, and one detailed accent at most. Start with the film you love most, try its easiest design first, and build up only if you enjoy the process. If you want more ideas in the same style, try the Nail Idea Generator, explore the Beauty Tools hub, and check our beginner guide if you are new to nail art.
This article is general beauty guidance, not professional or medical advice. If a nail is painful, swollen, discoloured, or lifting from the nail bed, seek professional advice instead of covering it.