Table of Contents
Halloween is a great time to get creative with nail art, but not everyone has hours to spare to create intricate designs. Need festive, chic nails but don’t have time for a long salon appointment or complicated DIY process? Quick Halloween Nail Designs are the answer. With a few basic nail colors, simple tools and a little creativity you can create spooky, and beautiful looks in a short amount of time.
Lots of options, with choices for every nail length and style, from tiny ghosts and pumpkins to chic black-and-orange combos. Whatever your vibe, from natural nails to press-ons or acrylic extensions, these ideas will have you sporting a Halloween-inspired mani in no time.
There are so many options for every nail length and style from tiny ghosts and pumpkins to chic black-and-orange combos. Whether you’re a natural nail lover, press-on fan, or acrylic extension aficionado, these ideas will have you rocking a Halloween-inspired mani in no time. In this article, we will discuss in detail the Quick Halloween Nail Designs and new design ideas for the holiday.
Why Choose Quick Halloween Nail Designs?
Halloween nail art doesn’t need to be complicated. Simple designs can still stand out, while being easier to create and maintain.
Perfect for Last-Minute Halloween Plans
If you’re going to a Halloween party and you don’t have a lot of time, simple nail art can give you a quick look change. A dark base with a few small Halloween details is a festive manicure you can pull off without having to be a nail-art expert.
Easy for Beginners
Many Halloween designs use basic shapes like dots, lines, triangles and small curves. They are also a great option for beginners who are still learning how to use dotting tools and nail-art brushes.
Works With Different Nail Styles
These ideas can be used for short, medium or long nails. They can also work with natural nails, gel polish, press-ons and acrylic nails so you can choose the style that best suits your preference.
Simple Black Halloween Nail Designs
Black is one of the easiest colors to work with for Halloween nail art. It creates a mysterious and spooky look instantly and goes well with other colors.
Black and Orange Combination
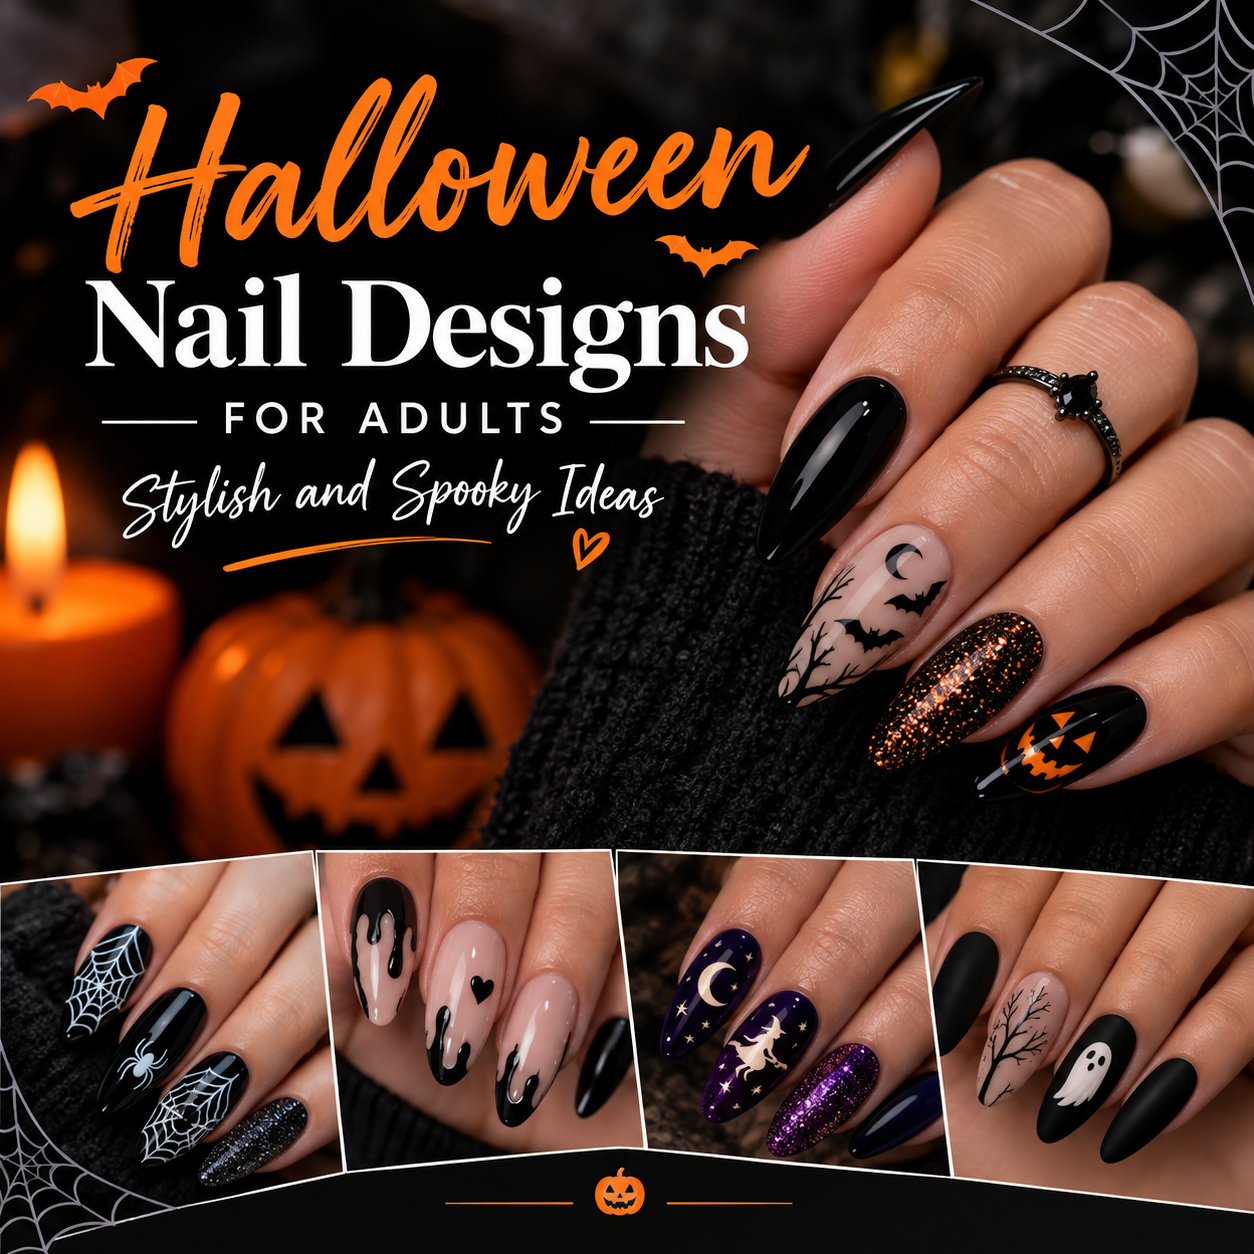
Paint your nails with a glossy black polish and add small orange dots, pumpkins, or stripes. The traditional Halloween colors create an instantly recognizable festive look.
Matte Black With Glossy Details
For a more modern appearance, try a matte black base and add glossy black spiders, bats, or small lines. The difference between the matte and shiny finishes creates subtle detail without requiring complicated artwork.
Black French Tips
A black French manicure is another quick option. Use a nude or transparent base and paint the tips black. Add a tiny spider, ghost, or pumpkin on one accent nail for a Halloween touch.
Cute and Easy Halloween Nail Ideas
Not every Halloween manicure needs to look scary. Cute designs are ideal if you want something playful and colorful.
Tiny Ghost Nails
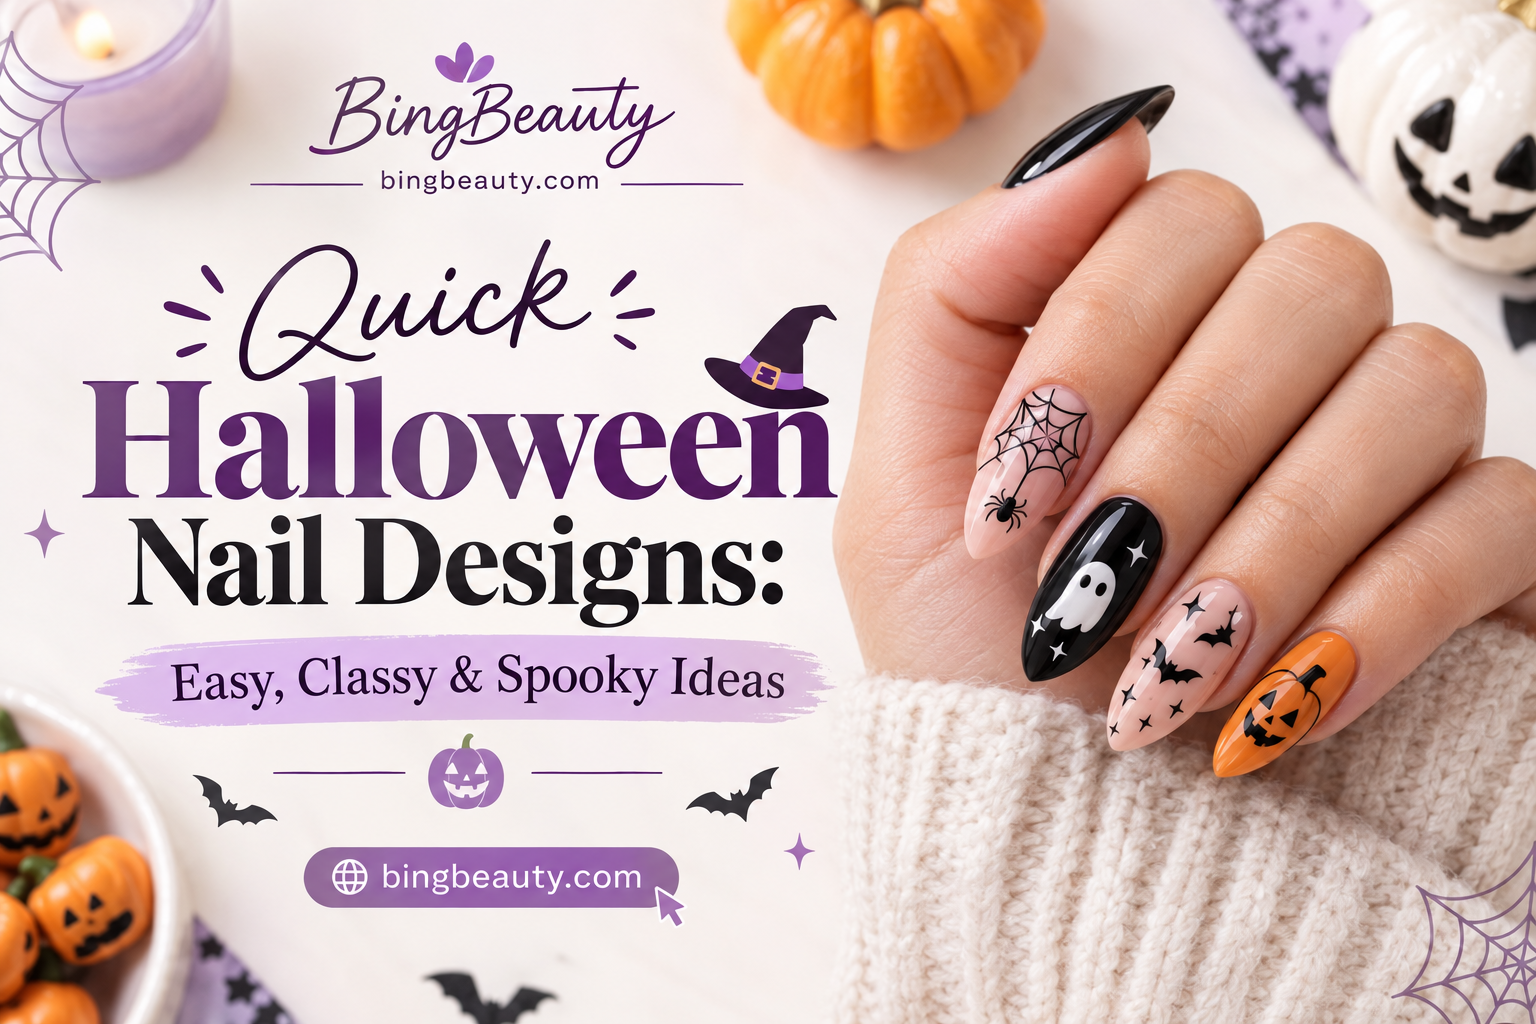
Start with a light-colored or nude base. Use white polish to create small ghost shapes and add tiny black dots for eyes. Because the ghosts are small, you can place one on each nail or use them as accent details.
Mini Pumpkin Designs
Orange pumpkins are another beginner-friendly choice. Create a small orange circle or pumpkin shape and add a simple green or black stem. You can place pumpkins near the tip of the nail for a French-tip-inspired effect.
Little Spiderweb Details
Spiderwebs may look complicated, but they can be simplified. Draw three or four thin lines crossing at one point and connect them with small curved lines. Keeping the design small makes it faster and easier.
Classy Halloween Nails for an Elegant Look
Halloween nail art can be festive without looking overly dramatic. If you prefer sophisticated manicures, Classy Halloween nails can combine subtle seasonal details with elegant colors.
Nude Nails With Black Details
A nude or beige base creates a clean foundation. Add small black bats, stars, moons, or spiderwebs to one or two nails. This approach keeps the manicure elegant while still giving it a Halloween theme.
Burgundy and Gold
Deep burgundy is a beautiful alternative to traditional bright orange. Combine it with gold details for a sophisticated autumn-inspired manicure. A thin gold line or small metallic accent can make the design look polished.
Minimalist French Halloween Tips
Instead of traditional white French tips, try black, burgundy, orange, or dark purple tips. Add a tiny Halloween symbol to one accent nail for a subtle seasonal finish.
Quick Halloween Nail Designs for Acrylic Nails
If you wear “acrylic” extensions, you have even more space for creative Halloween artwork. Longer nails can accommodate larger designs, while short acrylics can still look stylish with minimal details.
Acrylic Pumpkin Tips
Use a neutral base and create orange French tips shaped like tiny pumpkins. Add black lines or small stems to make the design more recognizable.
Halloween Character Accents
Choose one or two nails for small Halloween characters such as ghosts, black cats, vampires, or pumpkins. Keep the remaining nails simple with solid black, orange, or nude polish.
Chrome and Glitter Accents
Acrylic nails can also be paired with glitter or chrome effects. Apply a dark base and add a small amount of metallic powder or glitter to create a dramatic Halloween finish.
Quick Halloween Nail Designs Using Only Two Colors
You do not need a large collection of nail polish to create attractive Halloween art. Two colors can be enough.
Black and White
Black and white create a timeless combination. Try white ghost designs over black nails or black spiderwebs over white nails.
Orange and Black
This is the classic Halloween combination. Use orange as the base on some nails and black on others. Add simple lines, dots, pumpkins, or bats to complete the look.
Purple and Black
Dark purple gives Halloween nails a slightly mysterious appearance. Pair a purple base with black details for a design that feels festive but less traditional.
How to Create Quick Halloween Nail Designs at Home
Creating simple Halloween nail art at home can be easy if you prepare your tools before starting.
Step 1: Prepare Your Nails
Clean your nails, remove old polish, shape the edges, and gently push back the cuticles. Apply a base coat to help protect the natural nail and create a smoother surface.
Step 2: Apply Your Base Color
Choose a Halloween-inspired shade such as black, orange, purple, burgundy, nude, or white. Apply one or two thin coats and allow each layer to dry properly.
Step 3: Add Simple Decorations
Use a fine nail-art brush, dotting tool, toothpick, or the tip of a small brush to create your designs. Start with basic shapes rather than attempting highly detailed artwork.
Step 4: Seal the Design
Finish with a quality top coat. This helps protect your artwork and gives the manicure a smoother, more polished appearance.
Halloween Nail Designs for Short Nails
Short nails are ideal for minimalist Halloween artwork. Since there is less surface area, small details can look particularly stylish.
Tiny Bats and Stars
Use a neutral or dark base and add tiny bats and stars. Keep the shapes small so they do not overcrowd the nail.
Halloween French Tips
French tips are particularly useful for short nails because they add detail without covering the entire nail. Try orange or black tips with a small accent design.
Single Accent Nail
If detailed nail art feels difficult, decorate only one nail on each hand. Keep the remaining nails in a coordinating solid shade.
Halloween Nail Designs for Long Nails
Long nails provide more room for creative artwork and dramatic patterns.
Spooky Scene Nails
Create a different Halloween element on each nail, such as a moon, haunted house, ghost, spiderweb, or bat. Keep the colors consistent so the manicure looks coordinated.
Gradient Halloween Nails
Create an ombré effect using colors such as black, purple, orange, or burgundy. Add small Halloween symbols over the gradient for extra detail.
Glitter Halloween Nails
Apply glitter over a dark base and add simple Halloween shapes. This combination works especially well for parties and evening events.
Tips for Making Halloween Nail Art Faster
Creating nail art quickly is mostly about choosing designs that are simple and repeatable.
Use Nail Stickers
Halloween nail stickers can save significant time. Simply apply them over a dry base color and seal them with a top coat.
Keep Designs Minimal
You do not need artwork on every nail. A few carefully placed details can make the entire manicure feel festive.
Prepare Your Tools First
Have your polish, brushes, dotting tools, cotton swabs, and top coat ready before beginning. This prevents interruptions while working on the design.
How to Make Your Halloween Manicure Last Longer
A beautiful manicure is more enjoyable when it stays intact throughout the Halloween season.
Apply Thin Polish Layers
Thick layers can take longer to dry and may chip more easily. Thin, even coats usually provide better control.
Protect the Nail Tips
Seal the edges of your nails with top coat. This can help reduce premature chipping, especially if you frequently use your hands.
Avoid Excessive Water Exposure
Long exposure to water can affect some manicures and may contribute to lifting or chipping. Wear gloves when cleaning or doing household tasks.
Frequently Asked Questions
What are the easiest Halloween nail designs for beginners?
Some of the easiest options include black French tips, tiny ghosts, pumpkins, spiderwebs, bats, dots, and simple stripes. These designs require only basic shapes and can be completed relatively quickly.
Can I create Halloween nail art on short nails?
Yes. Short nails can look excellent with minimalist Halloween artwork. Small ghosts, bats, stars, pumpkins, French tips, and accent nails are especially suitable.
Are these designs suitable for acrylic nails?
Yes. Many simple Halloween designs work well on **acrylic** nails. Longer acrylic extensions also provide additional space for larger artwork, glitter, chrome effects, and detailed Halloween characters.
How can I make Halloween nails look classy?
Choose neutral or deep shades such as nude, burgundy, black, dark purple, or brown. Keep the Halloween details small and use minimalist elements such as tiny bats, moons, stars, or subtle French tips.
How long does simple Halloween nail art take?
Basic designs can often be completed much faster than detailed nail art. The exact time depends on the polish, design, drying method, and whether you are working on natural nails, gel nails, press-ons, or acrylic extensions.
What colors are best for Halloween nails?
Black, orange, white, purple, burgundy, dark green, nude, and metallic gold are popular choices. You can combine two or three shades to create a coordinated seasonal manicure.
Final Thoughts
Halloween nail art does not have to be complicated or time-consuming. With the right colors and a few simple techniques, you can create stylish seasonal manicures at home or request similar designs at a salon. From cute ghosts and pumpkins to elegant French tips and sophisticated dark shades, there are countless ways to personalize your Halloween look.
The best Quick Halloween nail designs are the ones that match your personal style and fit the amount of time you have available. Whether you prefer minimalist artwork, glamorous acrylic nails, or Classy Halloween nails, simple details can turn an everyday manicure into a festive Halloween statement.